This past week I went to go visit friends and family over in Washington D.C. and New York. It was a museum/ memorial walk fest! This time, I remembered to scan in the sketches early on, so here's a few sketches from my journey through D.C. and New York.
A sketch of the Lincoln Memorial done in a cheap Japanese brush pen, a water-soluble Pilot pen, a waterbrush, and a pencil.
Very cute elephant shrews at the National Zoo. Ink pens and pencil.
The only full color image I did on my trip. Watercolor and pencil of Passenger Pigeons from the "Birds of D.C." display at the Smithsonian Natural History Musuem. The female is a little rougher since my arm was getting numb by then.
A giant sloth skeleton at the Smithsonian Natural History Musuem. Pens and pencil.
An Allosaurus skeleton at the Smithsonian Natural History Musuem. Pens, pencil, and a little watercolor.
A Sakhmet statue at the Metropolitan Museum of Art. Pens and pencil. Her waist got a little truncated.
A quick sketch of the Greek mythology statue called "Andromeda and the Sea Monster" at the Metropolitan Museum of Art with pencil and colored pencil. The hand is a little rough.
Ballpoint pen sketches of NY subway commuters. The lower lady got a little compressed, probably because of the way I was holding the sketchbook.
And the conclusion of the trip! Rough mountain sketches with the brush pen on the plane returning home.
Thanks for coming along!
Showing posts with label black and white. Show all posts
Tuesday, January 24, 2012
Friday, December 03, 2010
Fun Fish in Black and White
These are from a while ago now, maybe a couple months ago, but I was going through the education list of fish illustrations they didn't have and chose my favorites to start off with. For me, pen and ink is a very calm affair, zen-like almost. Turn on the music/podcast and slowly watch a piece develop under your hands. The time frame for these illustrations was more than usual since I was just filling time between projects, so they're more detailed than I would normally get.
The best of the recent black and white illustrations:

A frogfish.
They move around on their fins like they're part walking, part hopping along the ocean floor. They're also related to anglerfish and are ambush predators with a lure on their head.

A Pacific spiny lumpsucker.
These guys always remind me of muppets. A very cute fish. Their disk shaped ventral fin lets them hold onto rocks in high tide areas.

A wolf eel.
Not truly an eel—they have pectoral fins—these guys have some brilliant orange and brown colors with blue-green eyes as babies and then turn into grey, spotted, heavy-jawed animals as adults.
The best of the recent black and white illustrations:

A frogfish.
They move around on their fins like they're part walking, part hopping along the ocean floor. They're also related to anglerfish and are ambush predators with a lure on their head.

A Pacific spiny lumpsucker.
These guys always remind me of muppets. A very cute fish. Their disk shaped ventral fin lets them hold onto rocks in high tide areas.

A wolf eel.
Not truly an eel—they have pectoral fins—these guys have some brilliant orange and brown colors with blue-green eyes as babies and then turn into grey, spotted, heavy-jawed animals as adults.
Friday, November 12, 2010
Tuco-tuco

A subterranean rodent that lives in South America, the tuco-tuco of the family Ctenomyidae.
Fulfilling an old request to draw one in black and white.
Thursday, December 10, 2009
The Process Behind the Madness
Here's a little insight into my own process for black and white drawings. This is the process I use at work, usually takes between 8 to 16 hrs to complete a piece, depending on the complexity. I'll be mostly going over general stages and not into specifics on each step. Next time I do an ink drawing, I'll try scanning in additional steps in the process.
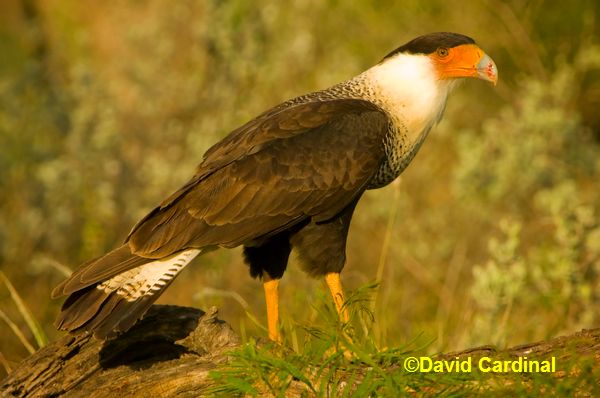
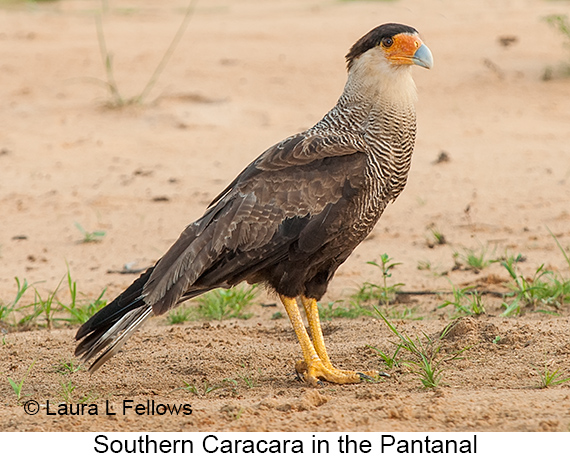
In this instance, I'm going to talk a little bit about how my Crested Caracara ink drawing was done.
As requested, a couple of close-up images.
The upper wing:

And the close-up of the head:
In this instance, I'm going to talk a little bit about how my Crested Caracara ink drawing was done.
First, I gather a nice library of reference photos, these days, mostly performed through a Google search, for both the common name and the scientific name. Generally, I end up with about 6-10 photos that compromise one drawing. This prevents the drawing from looking like any particular photo, and also includes enough detail to work up each part of the animal.
In this case, these photos here and here were used for the head. This one for the wings. Also this one and this one for the wing feathers. This one was referenced for the wing and tail feathers.
Two photos were used as the main references, which give the majority of the look of the final piece. This one was one I used a lot for the pose, wings, shadows, and patterning. Here's another I used the most for the pose and the feet.
A few other photos also played minor roles in detail references.
To save myself the trouble of sketching, then retracing onto tracing paper, I skip a step and sketch directly on tracing paper. The initial sketch is loose and light, with a 2H pencil, lots of erasing and correcting until I get something that looks like it matches all the references I used. Then, I make a few more small corrections in the process of transferring the image onto bristol using graphite transfer paper. All the dark lines on the sketch are the final lines that were transferred to the bristol paper.

Next step is to ink the transferred sketch. I generally start near the head, outlining the shape with a Hunt 512 nib. Anything that still feels strange at this point is erased and redrawn with the 2H pencil. I do most of the interior details with the Hunt 102 nib. Any stippling is done with a Micron .05 pen. And the end result:

A few other photos also played minor roles in detail references.
To save myself the trouble of sketching, then retracing onto tracing paper, I skip a step and sketch directly on tracing paper. The initial sketch is loose and light, with a 2H pencil, lots of erasing and correcting until I get something that looks like it matches all the references I used. Then, I make a few more small corrections in the process of transferring the image onto bristol using graphite transfer paper. All the dark lines on the sketch are the final lines that were transferred to the bristol paper.

Next step is to ink the transferred sketch. I generally start near the head, outlining the shape with a Hunt 512 nib. Anything that still feels strange at this point is erased and redrawn with the 2H pencil. I do most of the interior details with the Hunt 102 nib. Any stippling is done with a Micron .05 pen. And the end result:

As requested, a couple of close-up images.
The upper wing:

And the close-up of the head:
Thursday, November 12, 2009
Back to Black
While I have done some color pieces for work, it's all been concept for projects that aren't public yet, so here's a few more ink spots that I've done lately. On the homefront, I am working on a couple of pieces, but they are still WIP.
Here's a whitespotted bamboo shark:

A porcupinefish, no species in particular but the markings were modeled after a Diodon holocanthus:

A male American Kestrel:
.jpg)
A Harris's Hawk; I feel like the head's too big:

And while not strictly black and white, it is fairly monochromatic. Here's an octopus done in Adobe Illustrator in the style of Live Trace for a volunteer name tags board:

Working on a Crested Caracara pen and ink drawing now. Otherwise, mostly working on new signage.
Here's a whitespotted bamboo shark:

A porcupinefish, no species in particular but the markings were modeled after a Diodon holocanthus:

A male American Kestrel:
.jpg)
A Harris's Hawk; I feel like the head's too big:

And while not strictly black and white, it is fairly monochromatic. Here's an octopus done in Adobe Illustrator in the style of Live Trace for a volunteer name tags board:

Working on a Crested Caracara pen and ink drawing now. Otherwise, mostly working on new signage.
Sunday, July 20, 2008
Spreading the Ink


Tried out some pen techniques at work with a few duck and other recent illustrations. I realized I don't really have a good brush for inking; at least it worked for the large patches I had to cover. So, the duck foot was done in the precise, careful inking I normally do, same with the buffalo sculpin. The generic duck was done partially with a brush, and the duck head was done with some looser, more varied strokes. The desert tortoise was a slower process with more detail, but I fiddle with stroke variation on the shell.
Labels:
Aquarium of the Pacific,
birds,
black and white,
fish,
ink illustration,
reptiles
Saturday, April 19, 2008
Holding onto the Edge


A couple of Gulf of California's critically endangered residents, the vaquita whale and the totoaba fish--both are about the same size at about 6 ft. Overfishing of the totoaba using gillnets have decreased both populations to the point of near extinction. The decreased flow of water from the Colorado River hasn't helped either. Current conservation efforts include the creation of a nature preserve between the Colorado River delta and the upper portion of the Gulf of California.
Originals are 11X14 done in pen and ink for work.
Wednesday, February 13, 2008
Slither and Slink

Some eels for your viewing pleasure. Eels can be more beautiful, with more complex patterns than you'd think, especially since most people jump to the California moray eel or perhaps the eels in The Little Mermaid when thinking about what eels might look like. They are certainly more diverse in form and pattern than I'd ever thought before seeing so many different species. All in black and white with pen and ink of the species that can be found at the Aquarium of the Pacific.
Thursday, December 13, 2007
The Simplicity of Black and White


Been working on images for the volunteer information cards at work. I've forgotten how quick and simple black and white can be, plus I really like working with the ol' croquil and ink bottle. Some microns tossed in as well for the stippling. It's a fairly pleasant way to fill the hours. Besides, I can eliminate any major ink smudges with the erase function in PS. Here are just a few of the images.
Subscribe to:
Posts (Atom)