This past week I went to go visit friends and family over in Washington D.C. and New York. It was a museum/ memorial walk fest! This time, I remembered to scan in the sketches early on, so here's a few sketches from my journey through D.C. and New York.
A sketch of the Lincoln Memorial done in a cheap Japanese brush pen, a water-soluble Pilot pen, a waterbrush, and a pencil.
Very cute elephant shrews at the National Zoo. Ink pens and pencil.
The only full color image I did on my trip. Watercolor and pencil of Passenger Pigeons from the "Birds of D.C." display at the Smithsonian Natural History Musuem. The female is a little rougher since my arm was getting numb by then.
A giant sloth skeleton at the Smithsonian Natural History Musuem. Pens and pencil.
An Allosaurus skeleton at the Smithsonian Natural History Musuem. Pens, pencil, and a little watercolor.
A Sakhmet statue at the Metropolitan Museum of Art. Pens and pencil. Her waist got a little truncated.
A quick sketch of the Greek mythology statue called "Andromeda and the Sea Monster" at the Metropolitan Museum of Art with pencil and colored pencil. The hand is a little rough.
Ballpoint pen sketches of NY subway commuters. The lower lady got a little compressed, probably because of the way I was holding the sketchbook.
And the conclusion of the trip! Rough mountain sketches with the brush pen on the plane returning home.
Thanks for coming along!
Tuesday, January 24, 2012
Friday, July 08, 2011
Concept Art
In this post I talk about concept art, another example of why you would use an illustration as opposed to a photograph. Concept art is the physical form of an idea, used in my job to make a case for funding, for fellow employee's to visualize what they're planning, and for fabricators to visualize what the aquarium would like in the final product. The concept art that I do is usually quick and dirty and isn't as beautiful and thorough as that found in the breathtaking vistas of the concept art for games; it's mostly to have something physical to look at to get a better idea of what everyone is looking for. Most of the time, the final product doesn't resemble the original art and sometimes the image is as far as the idea goes.
To make the process faster, I've used Google Sketchup as a base for most of my concept art. Sketchup is very useful for plugging in real-life measurements and being able to get perspective lines and a sense of the space. The final art is mostly digital for the ease of revisions, but sometimes, I also get to use watercolor for that traditional architectural rendering look. Here's just a few of the projects I've worked on over the past few years.

This is the Sketchup version of our now open Ocean Science Center. Done 2 years before the actual space was opened.

Here is the Photoshop rendering, based on the Sketchup model. You can see that the overall layout and positions of most of the people are based on the model. I had a lot of fun trolling through the internet for fashion ideas to clothe the simple Sketchup models. Also, as requested, the people in the final rendering reflect the diversity of our guests. I had more time than usual to render this one, about 2 weeks. This image was used as part of the funding request and as a glimpse of the up-and-coming exhibit.

Another simple Sketchup model used as the base for the final rendering. This is of a potential otter play structure.

I've learned a lot about rendering rocks in this job. This one was a little experimental, trying out some Photoshop brush techniques that I first worked with on the Harbor Reef computer mural. This one was fairly rough, maybe a week or less to render with a few revisions thrown in. So far, I haven't actually seen this structure made.

Here is a Sketchup model of our new rock shrimp habitat. The Sketchup rocks gave me a rough idea of how much space a particular-sized rock would take up.

The final Photoshop rendering. I'm pleased with the way this one turned out because the real-life structure actually resembles my rendering.

We are changing out an existing exhibit to make way for penguins! Here is the Sketchup rendering that I used as the basis for my final rendering.

One of the few times I got to break out the watercolors. This rendering is done in watercolor and graphite and was shown at our fundraising event "Aquarium After Dark" to give everyone a glimpse of what the penguin exhibit might look like when it is finished next year.
I have a lot of fun with these concept renderings because they are a challenge to make sure I get everything the client wants in the image and because it's a little like making your own world in miniature.
To make the process faster, I've used Google Sketchup as a base for most of my concept art. Sketchup is very useful for plugging in real-life measurements and being able to get perspective lines and a sense of the space. The final art is mostly digital for the ease of revisions, but sometimes, I also get to use watercolor for that traditional architectural rendering look. Here's just a few of the projects I've worked on over the past few years.

This is the Sketchup version of our now open Ocean Science Center. Done 2 years before the actual space was opened.

Here is the Photoshop rendering, based on the Sketchup model. You can see that the overall layout and positions of most of the people are based on the model. I had a lot of fun trolling through the internet for fashion ideas to clothe the simple Sketchup models. Also, as requested, the people in the final rendering reflect the diversity of our guests. I had more time than usual to render this one, about 2 weeks. This image was used as part of the funding request and as a glimpse of the up-and-coming exhibit.

Another simple Sketchup model used as the base for the final rendering. This is of a potential otter play structure.

I've learned a lot about rendering rocks in this job. This one was a little experimental, trying out some Photoshop brush techniques that I first worked with on the Harbor Reef computer mural. This one was fairly rough, maybe a week or less to render with a few revisions thrown in. So far, I haven't actually seen this structure made.

Here is a Sketchup model of our new rock shrimp habitat. The Sketchup rocks gave me a rough idea of how much space a particular-sized rock would take up.

The final Photoshop rendering. I'm pleased with the way this one turned out because the real-life structure actually resembles my rendering.

We are changing out an existing exhibit to make way for penguins! Here is the Sketchup rendering that I used as the basis for my final rendering.

One of the few times I got to break out the watercolors. This rendering is done in watercolor and graphite and was shown at our fundraising event "Aquarium After Dark" to give everyone a glimpse of what the penguin exhibit might look like when it is finished next year.
I have a lot of fun with these concept renderings because they are a challenge to make sure I get everything the client wants in the image and because it's a little like making your own world in miniature.
Sunday, June 19, 2011
Urban Ocean Festival 2011
Here's my contribution to the Urban Ocean Festival at the Aquarium of the Pacific.

One of the more fun murals done in about ~12 1/2 hours over 2 days. Part of the Art Miles Mural Project, an amazing project bringing art to children all around the world. I was one of the live artists to draw people in while kids and families were welcome to join in on the fun with one of our other canvases set up to paint.
Thanks to all the volunteers and staff that helped out. Couldn't of pulled off such a speedy mural without all the help I received with water changes, paint distributing, and canvas moving. Everyone was awesome!
The theme was Urban Ocean and I started out with the thought of gears in the ocean and a couple of photos from the Monterey Bay Aquarium of a wolf eel skeleton and an octopus. One of my fastest murals and paintings to date. I had a lot of fun, with free reign and creativity that I don't normally get on work projects.

One of the more fun murals done in about ~12 1/2 hours over 2 days. Part of the Art Miles Mural Project, an amazing project bringing art to children all around the world. I was one of the live artists to draw people in while kids and families were welcome to join in on the fun with one of our other canvases set up to paint.
Thanks to all the volunteers and staff that helped out. Couldn't of pulled off such a speedy mural without all the help I received with water changes, paint distributing, and canvas moving. Everyone was awesome!
The theme was Urban Ocean and I started out with the thought of gears in the ocean and a couple of photos from the Monterey Bay Aquarium of a wolf eel skeleton and an octopus. One of my fastest murals and paintings to date. I had a lot of fun, with free reign and creativity that I don't normally get on work projects.
Friday, December 03, 2010
Fun Fish in Black and White
These are from a while ago now, maybe a couple months ago, but I was going through the education list of fish illustrations they didn't have and chose my favorites to start off with. For me, pen and ink is a very calm affair, zen-like almost. Turn on the music/podcast and slowly watch a piece develop under your hands. The time frame for these illustrations was more than usual since I was just filling time between projects, so they're more detailed than I would normally get.
The best of the recent black and white illustrations:

A frogfish.
They move around on their fins like they're part walking, part hopping along the ocean floor. They're also related to anglerfish and are ambush predators with a lure on their head.

A Pacific spiny lumpsucker.
These guys always remind me of muppets. A very cute fish. Their disk shaped ventral fin lets them hold onto rocks in high tide areas.

A wolf eel.
Not truly an eel—they have pectoral fins—these guys have some brilliant orange and brown colors with blue-green eyes as babies and then turn into grey, spotted, heavy-jawed animals as adults.
The best of the recent black and white illustrations:

A frogfish.
They move around on their fins like they're part walking, part hopping along the ocean floor. They're also related to anglerfish and are ambush predators with a lure on their head.

A Pacific spiny lumpsucker.
These guys always remind me of muppets. A very cute fish. Their disk shaped ventral fin lets them hold onto rocks in high tide areas.

A wolf eel.
Not truly an eel—they have pectoral fins—these guys have some brilliant orange and brown colors with blue-green eyes as babies and then turn into grey, spotted, heavy-jawed animals as adults.
Friday, November 12, 2010
Tuco-tuco

A subterranean rodent that lives in South America, the tuco-tuco of the family Ctenomyidae.
Fulfilling an old request to draw one in black and white.
Friday, September 03, 2010
Garden Signage: Non-Plant Illustrations
Here are a few close-ups of the non-plant ID images used in the Garden signage.
Food waste that can be used for composting. This image was a simple pencil sketch composed from various photos and colored in Photoshop.

Compost and worms. Again, a simple sketch composed from various worm and compost photos, colored in Photoshop.

Organic pesticides. Usually when I do a vector image of an existing object, I start out with a trace of a photo of the object, usually low res, and adjust accordingly.

A close up of the home with the programmable drip irrigation box. Composed from various Illustrator and Photoshop elements.
Food waste that can be used for composting. This image was a simple pencil sketch composed from various photos and colored in Photoshop.

Compost and worms. Again, a simple sketch composed from various worm and compost photos, colored in Photoshop.

Organic pesticides. Usually when I do a vector image of an existing object, I start out with a trace of a photo of the object, usually low res, and adjust accordingly.

A close up of the home with the programmable drip irrigation box. Composed from various Illustrator and Photoshop elements.
Friday, August 27, 2010
Garden Signage
Here following are the Aquarium's garden signage, which feature my plant illustrations and vector drawings. The first two are used out in front to talk about our drought tolerant garden, designed to match existing signage in the front and the other one is used behind-the-scenes at our compost bin, designed to match our other BTS signs.


Wednesday, May 26, 2010
Water Wise Plants for the Home Garden
The Aquarium of the Pacific had it's official opening of its Earth-Friendly Garden on Earth Day 2010, featuring drought-resistant plants. The goal of this project was to show a variety of plants that had low water usage and that also looked beautiful, encouraging guests to plant a few in their home garden. I did the illustrations for the signs and based the layout on existing signage. Ahead are just a few of the many beautiful choices for a drought-resistant garden.
Foxtail Agave
Agave attenuata

Blue Fingers
Senecio mandraliscae

California Lilac "Blue Cushion"
Ceanothus "Blue Cushion"

Douglas Iris
Iris douglasiana

Jester Flax
Phormium tenax "Jester"

Spanish Lavender
Lavandula stoechas "Otto Quast"

Carmel Sur Manzanita
Arcostaphylos edmundsii "Carmel Sur"

Rock Rose
Cistus "Sunset"

Cleveland Sage
Salvia clevelandii "Winnifred Gilman"

Next time, a post of the actual signs and some plant illustrations from last year for the Watershed Exhibit website.
Foxtail Agave
Agave attenuata

Blue Fingers
Senecio mandraliscae

California Lilac "Blue Cushion"
Ceanothus "Blue Cushion"

Douglas Iris
Iris douglasiana

Jester Flax
Phormium tenax "Jester"

Spanish Lavender
Lavandula stoechas "Otto Quast"

Carmel Sur Manzanita
Arcostaphylos edmundsii "Carmel Sur"

Rock Rose
Cistus "Sunset"

Cleveland Sage
Salvia clevelandii "Winnifred Gilman"

Next time, a post of the actual signs and some plant illustrations from last year for the Watershed Exhibit website.
Friday, February 12, 2010
As I Sail On
Here's the latest large art project I was involved in for work. It's a sail-like banner for the Aquarium's Shark Lagoon, currently hanging on the elevator tower. Actual size is ~8' x 13'. Original was a sketch that was colored in Photoshop. I've only got a digital file of it now; the photos I took on the day it went up turned out too dark and grainy. Better photos of the actual sail to come.
Labels:
Adobe Photoshop,
Aquarium of the Pacific,
Digital Art,
fish,
sharks
Thursday, December 10, 2009
The Process Behind the Madness
Here's a little insight into my own process for black and white drawings. This is the process I use at work, usually takes between 8 to 16 hrs to complete a piece, depending on the complexity. I'll be mostly going over general stages and not into specifics on each step. Next time I do an ink drawing, I'll try scanning in additional steps in the process.
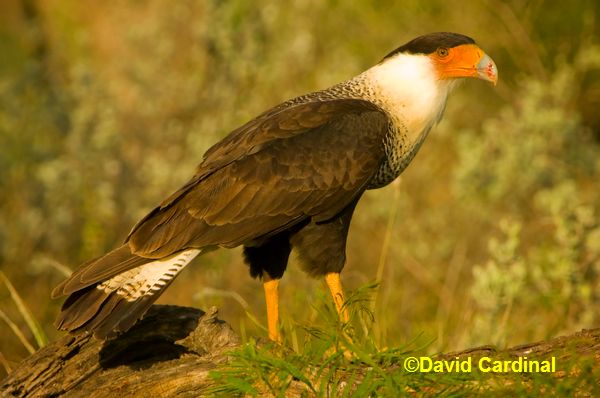
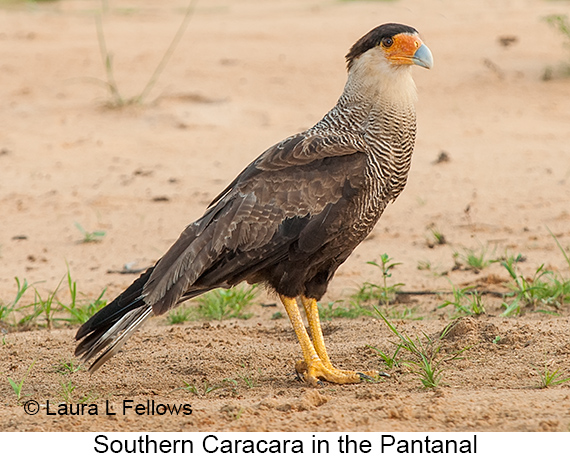
In this instance, I'm going to talk a little bit about how my Crested Caracara ink drawing was done.
As requested, a couple of close-up images.
The upper wing:

And the close-up of the head:
In this instance, I'm going to talk a little bit about how my Crested Caracara ink drawing was done.
First, I gather a nice library of reference photos, these days, mostly performed through a Google search, for both the common name and the scientific name. Generally, I end up with about 6-10 photos that compromise one drawing. This prevents the drawing from looking like any particular photo, and also includes enough detail to work up each part of the animal.
In this case, these photos here and here were used for the head. This one for the wings. Also this one and this one for the wing feathers. This one was referenced for the wing and tail feathers.
Two photos were used as the main references, which give the majority of the look of the final piece. This one was one I used a lot for the pose, wings, shadows, and patterning. Here's another I used the most for the pose and the feet.
A few other photos also played minor roles in detail references.
To save myself the trouble of sketching, then retracing onto tracing paper, I skip a step and sketch directly on tracing paper. The initial sketch is loose and light, with a 2H pencil, lots of erasing and correcting until I get something that looks like it matches all the references I used. Then, I make a few more small corrections in the process of transferring the image onto bristol using graphite transfer paper. All the dark lines on the sketch are the final lines that were transferred to the bristol paper.

Next step is to ink the transferred sketch. I generally start near the head, outlining the shape with a Hunt 512 nib. Anything that still feels strange at this point is erased and redrawn with the 2H pencil. I do most of the interior details with the Hunt 102 nib. Any stippling is done with a Micron .05 pen. And the end result:

A few other photos also played minor roles in detail references.
To save myself the trouble of sketching, then retracing onto tracing paper, I skip a step and sketch directly on tracing paper. The initial sketch is loose and light, with a 2H pencil, lots of erasing and correcting until I get something that looks like it matches all the references I used. Then, I make a few more small corrections in the process of transferring the image onto bristol using graphite transfer paper. All the dark lines on the sketch are the final lines that were transferred to the bristol paper.

Next step is to ink the transferred sketch. I generally start near the head, outlining the shape with a Hunt 512 nib. Anything that still feels strange at this point is erased and redrawn with the 2H pencil. I do most of the interior details with the Hunt 102 nib. Any stippling is done with a Micron .05 pen. And the end result:

As requested, a couple of close-up images.
The upper wing:

And the close-up of the head:
Thursday, November 12, 2009
Back to Black
While I have done some color pieces for work, it's all been concept for projects that aren't public yet, so here's a few more ink spots that I've done lately. On the homefront, I am working on a couple of pieces, but they are still WIP.
Here's a whitespotted bamboo shark:

A porcupinefish, no species in particular but the markings were modeled after a Diodon holocanthus:

A male American Kestrel:
.jpg)
A Harris's Hawk; I feel like the head's too big:

And while not strictly black and white, it is fairly monochromatic. Here's an octopus done in Adobe Illustrator in the style of Live Trace for a volunteer name tags board:

Working on a Crested Caracara pen and ink drawing now. Otherwise, mostly working on new signage.
Here's a whitespotted bamboo shark:

A porcupinefish, no species in particular but the markings were modeled after a Diodon holocanthus:

A male American Kestrel:
.jpg)
A Harris's Hawk; I feel like the head's too big:

And while not strictly black and white, it is fairly monochromatic. Here's an octopus done in Adobe Illustrator in the style of Live Trace for a volunteer name tags board:

Working on a Crested Caracara pen and ink drawing now. Otherwise, mostly working on new signage.
Sunday, September 06, 2009
Mural Madness!
Finally getting around to posting pictures of the murals I worked on this year.
The murals are © to Aquarium of the Pacific, but the photos are © to me.
Here's an overview of the Watershed Exhibit mural:

You can see that the mugwort's starting to overgrow the right side of the mural.
These days it's 6 ft tall and completely covers the bottom half of the mural.
Here's a shot of the left side of the mural:

The middle of the mural:

Several close-ups of some of the animals:
Great Blue Heron

Harvest Mouse

Black-Neck Stilt

Here are some photos from the Shark Zone murals on Harbor Terrace. While the watershed mural was painstakingly scientifically accurate, Shark Zone was done to brighten up the area. While the colors are truly that bright on some of the different species, I punched up some colors and shifted others. The mural is also a mix of tropical and temperate species.
The main part of the wall mural on the left wall:

The other side, on the right wall:

The two computer murals printed out as stickers. The one on the food cart is a combination of a watercolor whale shark with some Photoshop filters and a lot of copy-paste fish. That one had a short deadline and was done in a day. The one on the window is a Photoshop creation based on a rough pencil sketch. All the corals are put in there more for aesthetics than for the actual zone and place they grow in:

Here's the actual computer image of the window image, "Harbor Reef."

Some close-ups of the wall mural:
bat ray

bluespotted ray

Anemone! Based off a whitespotted rose anemone.

Hope you enjoyed your tour of the recent murals I worked on. I finally have them up!
The murals are © to Aquarium of the Pacific, but the photos are © to me.
Here's an overview of the Watershed Exhibit mural:

You can see that the mugwort's starting to overgrow the right side of the mural.
These days it's 6 ft tall and completely covers the bottom half of the mural.
Here's a shot of the left side of the mural:

The middle of the mural:

Several close-ups of some of the animals:
Great Blue Heron

Harvest Mouse

Black-Neck Stilt

Here are some photos from the Shark Zone murals on Harbor Terrace. While the watershed mural was painstakingly scientifically accurate, Shark Zone was done to brighten up the area. While the colors are truly that bright on some of the different species, I punched up some colors and shifted others. The mural is also a mix of tropical and temperate species.
The main part of the wall mural on the left wall:

The other side, on the right wall:

The two computer murals printed out as stickers. The one on the food cart is a combination of a watercolor whale shark with some Photoshop filters and a lot of copy-paste fish. That one had a short deadline and was done in a day. The one on the window is a Photoshop creation based on a rough pencil sketch. All the corals are put in there more for aesthetics than for the actual zone and place they grow in:

Here's the actual computer image of the window image, "Harbor Reef."

Some close-ups of the wall mural:
bat ray

bluespotted ray

Anemone! Based off a whitespotted rose anemone.

Hope you enjoyed your tour of the recent murals I worked on. I finally have them up!
Subscribe to:
Posts (Atom)